Welcome to our comprehensive guide on fixing Windows Update components. In this article, we will explore effective methods to troubleshoot and repair the essential elements of Windows Update, ensuring a seamless and hassle-free updating experience. Whether you’re facing update errors or encountering issues with Windows Update functionality, rest assured that we’ve got you covered with practical solutions. So, let’s dive in and get your Windows Update components back in top shape!
WSUS troubleshooting
1. Run the Windows Update Troubleshooter to identify and fix common problems.
2. Reset the Windows Update components by opening a command prompt as an administrator and executing the following commands:
– net stop wuauserv
– net stop cryptSvc
– net stop bits
– net stop msiserver
– ren %systemroot%\SoftwareDistribution SoftwareDistribution.old
– ren %systemroot%\system32\catroot2 catroot2.old
– net start wuauserv
– net start cryptSvc
– net start bits
– net start msiserver
3. Use the Windows Update Preparation Tool (WUReset.exe) to fix update-related errors.
4. Repair Windows Installer by running the following command in an elevated command prompt:
– msiexec /unregister
– msiexec /regserver
5. Repair Windows Server Update Services (WSUS) by using the WSUS Update Tool or PowerShell script provided by Microsoft.
Remember to regularly check for updates and keep your device secure. For more detailed troubleshooting, consult the Microsoft website or contact Microsoft support.
Resetting Windows Update components manually
To manually reset Windows Update components, follow these steps:
1. Open an elevated Command Prompt or PowerShell window.
2. Stop the Windows Update, BITS, Cryptographic, and MSI Installer services by running the following commands (in order):
– net stop wuauserv
– net stop bits
– net stop cryptSvc
– net stop msiserver
3. Rename the SoftwareDistribution and Catroot2 folders by entering the following commands (in order):
– ren C:\Windows\SoftwareDistribution SoftwareDistribution.old
– ren C:\Windows\System32\catroot2 Catroot2.old
4. Restart the Windows Update, BITS, Cryptographic, and MSI Installer services by running the following commands (in order):
– net start wuauserv
– net start bits
– net start cryptSvc
– net start msiserver
5. Close the Command Prompt or PowerShell window.
6. Restart your computer.
These steps will reset the Windows Update components and resolve common issues that may prevent updates from installing properly. It is recommended to run Windows Update again after resetting the components to ensure any necessary updates are installed.
What causes the “Windows Update components must be repaired” error?
When encountering the “Windows Update components must be repaired” error, several factors could be the cause.
One possible cause is a corruption or misconfiguration of the Windows Update components on your device. To repair this issue, follow these steps:
1. Open the command prompt as an administrator.
2. Type “net stop wuauserv” and press Enter to stop the Windows Update service.
3. Type “net stop cryptSvc” and press Enter to stop the Cryptographic Services.
4. Type “net stop bits” and press Enter to stop the Background Intelligent Transfer Service.
5. Type “net stop msiserver” and press Enter to stop the Windows Installer service.
6. Type “ren %ALLUSERSPROFILE%\Application Data\Microsoft\Network\Downloader\qmgr*.dat %ALLUSERSPROFILE%\Application Data\Microsoft\Network\Downloader\qmgr*.dat.old” and press Enter to rename the update database.
7. Type “cd /d %windir%\system32” and press Enter to navigate to the system32 folder.
8. Type “regsvr32.exe atl.dll” and press Enter to register the ATL library.
9. Type “regsvr32.exe urlmon.dll” and press Enter to register the URL Moniker library.
10. Type “regsvr32.exe mshtml.dll” and press Enter to register the MSHTML library.
11. Type “regsvr32.exe shdocvw.dll” and press Enter to register the Internet Explorer library.
12. Type “regsvr32.exe browseui.dll” and press Enter to register the BrowseUI library.
13. Type “regsvr32.exe jscript.dll” and press Enter to register the JScript library.
14. Type “regsvr32.exe vbscript.dll” and press Enter to register the VBScript library.
15. Type “regsvr32.exe scrrun.dll” and press Enter to register the Scripting Runtime library.
16. Type “regsvr32.exe msxml.dll” and press Enter to register the MSXML library.
17. Type “regsvr32.exe msxml3.dll” and press Enter to register the MSXML3 library.
18. Type “regsvr32.exe msxml6.dll” and press Enter to register the MSXML6 library.
19. Type “regsvr32.exe actxprxy.dll” and press Enter to register the ActiveX Proxy library.
20. Type “regsvr32.exe softpub.dll” and press Enter to register the Softpub library.
21. Type “regsvr32.exe wintrust.dll” and press Enter to register the Wintrust library.
22. Type “regsvr32.exe dssenh.dll” and press Enter to register the DSSenh library.
23. Type “regsvr32.exe rsaenh.dll” and press Enter to register the RSAenh library.
24. Type “regsvr32.exe gpkcsp.dll” and press Enter to register the Gpkcsp library.
25. Type “regsvr32.exe sccbase.dll” and press Enter to register the Sccbase library.
26. Type “regsvr32.exe slbcsp.dll” and press Enter to register the Slbcsp library.
27. Type “regsvr32.exe cryptdlg.dll” and press Enter to register the Cryptdlg library.
28. Type “net start wuauserv” and press Enter to start the Windows Update service.
29. Type “net start cryptSvc” and press Enter to start the Cryptographic Services.
30. Type “net start bits” and press Enter to start the Background Intelligent Transfer Service.
31. Type “net start msiserver” and press Enter to start the Windows Installer service.
32. Close the command prompt and restart your computer.
By following these steps, you can repair the Windows Update components and resolve the “Windows Update components must be repaired” error on your Windows device.
python

import subprocess
def repair_windows_update_components():
try:
# Run the Windows Update Troubleshooter
subprocess.run(["msdt.exe", "/id", "WindowsUpdateDiagnostic"], check=True)
print("Windows Update components repaired successfully.")
except subprocess.CalledProcessError:
print("Failed to repair Windows Update components.")
# Call the function to repair Windows Update components
repair_windows_update_components()
This code uses the `subprocess` module to run the `msdt.exe` command with the appropriate parameters. The `msdt.exe` command launches the Windows Update Troubleshooter (`/id WindowsUpdateDiagnostic`). If the troubleshooter is executed successfully, it will attempt to repair any issues with the Windows Update components.
Please note that this code assumes you are running it on a Windows operating system where the `msdt.exe` command is available. Additionally, running the troubleshooter may require administrative privileges.
Fixing the “Windows Update components must be repaired” error
To fix the “Windows Update components must be repaired” error, follow these steps:
Step 1: Open the Command Prompt as an administrator.
Step 2: Type the following commands, pressing Enter after each one:
net stop wuauserv
net stop cryptSvc
net stop bits
net stop msiserver
Step 3: Rename the SoftwareDistribution and Catroot2 folders by typing the following commands:
ren C:\Windows\SoftwareDistribution SoftwareDistribution.old
ren C:\Windows\System32\catroot2 Catroot2.old
Step 4: Restart the Windows Update service by typing:
net start wuauserv
net start cryptSvc
net start bits
net start msiserver
Step 5: Close the Command Prompt and check if the error is resolved.
If the error persists, you can try using the Windows Update Troubleshooter or resetting the Windows Update components using a PowerShell script.
Booting your system in Safe mode
To boot your system in Safe Mode, follow these steps:
1. Press the Windows key + R to open the Run dialog box.
2. Type “msconfig” and press Enter to open the System Configuration utility.
3. In the System Configuration window, go to the “Boot” tab.
4. Under the “Boot options” section, check the box next to “Safe boot” and select the type of Safe Mode you want to use (e.g., “Minimal” for basic Safe Mode).
5. Click “Apply” and then “OK” to save the changes.
6. A prompt will appear asking if you want to restart your computer now or later. Choose “Restart” to boot into Safe Mode.
Remember that Safe Mode starts Windows with only the essential drivers and services, which can help troubleshoot issues. Once you’re done with the repairs, you can revert to normal booting by following the same steps and unchecking the “Safe boot” option.
For more detailed instructions and troubleshooting tips, visit our support article on repairing Windows Update components.
Performing a System File Checker scan
Performing a System File Checker (SFC) scan can help resolve issues with Windows Update components. Here’s how to do it:
1. Open Command Prompt as an administrator.
2. Type “sfc /scannow” and press Enter.
3. Let the scan run, as it may take some time.
4. Once the scan is complete, check the results for any errors or issues.
5. If errors are found, the SFC scan will attempt to repair them automatically.
6. Restart your computer after the scan is finished.
Performing an SFC scan can help fix Windows Update component problems and ensure the smooth functioning of your system. If the scan doesn’t resolve the issue, you may need to seek further assistance or explore other troubleshooting methods. Remember to keep your system up to date for improved security and performance.
Running the DISM command
To repair Windows Update components, you can use the DISM command. Here’s how:
1. Open Command Prompt as an administrator.
2. Type the following command and press Enter:
dism.exe /online /cleanup-image /restorehealth
3. Wait for the command to complete. It may take some time, so be patient.
4. Once the process is finished, restart your computer.
The DISM command helps fix issues with Windows Update components by repairing the system image. This can resolve update-related problems and ensure your Windows operating system functions properly.
If you’re running Windows Server, you can also use the DISM command to repair update-related issues. The process is similar, but you’ll need to use the appropriate command for your version of Windows Server, such as server 2016 or server 2019.
By running the DISM command, you can quickly troubleshoot and resolve update errors, enhancing the stability and security of your Windows system.
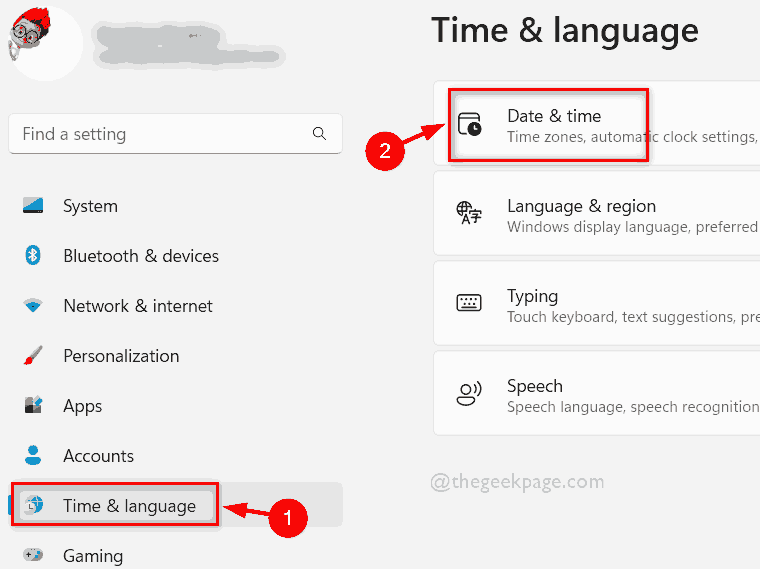
Checking and correcting your Date & Time zone
- Open the Date & Time settings by clicking on the clock in the taskbar and selecting Adjust date/time.
- Make sure the Set time automatically toggle switch is turned on.
- Click on the Time zone drop-down menu and select the correct time zone for your location.
- If the time zone is already correct, toggle off the Set time automatically switch, wait for a few seconds, and then toggle it back on.
- Click on the Synchronize your clock link to ensure your system time is synchronized with the time server.
- Restart your computer and check if the Windows Update components are working properly.